Strike While the Iron is Hot: How to Properly Iron a Shirt
I love to iron.
It’s weird, I know, but I get a great amount of satisfaction from smoothing out a wrinkled shirt with a hot iron.
Lately there have been a few posts on various blogs about how a man should approach ironing a shirt.
I’m here to tell you they’re wrong.
Well, maybe not wrong, exactly, but they sure do make it a lot more work than it needs to be.
I’ve been ironing my own shirts for the better part of twenty years, and I learned early on that wearing a dress shirt without looking like a hobo requires only a small effort.
That said, my first attempts at ironing were pathetic. I added more wrinkles to my shirts than I smoothed out. I was frustrated. Then one day, purely by accident, I found salvation.
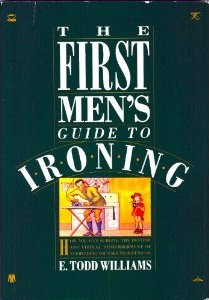
I was knocking around a now-defunct Borders, looking for any Barry Gifford novels I hadn’t yet read, when I tripped across the First Men’s Guide to Ironing by E. Todd Williams (now out of print). I bought it without hesitation.
This book immediately improved my ironing game.
Most importantly, I learned the pointy end of the ironing board was all but useless for ironing men’s shirts. Yes, that’s right—useless. Seriously, have you ever tried to iron a shirt on that pointy end?
The average guy ironer shouldn’t even bother with it; all the necessary business takes place at the squared-off end (which is known around here as the “good end”). Not only does this good end act as a reasonable stand-in for your shoulders, it makes positioning the shirt for best ironing results a lot easier.
So, with the help of this book—and some special modifications of my own—over the years I’ve perfected a quick (as in 45 seconds quick) and easy ironing process.
Equipment
 An Iron
You need a heavy iron, not one of those lightweight models out there, but a nice solid tool with some serious heft to it. I use a Black & Decker iron that’s about 15 years old—nice and heavy—what Mr. Williams calls “a real guy iron.”
An Ironing Board
You’ll need a flat board with a squared-off (i.e., “good”) end. Any board will do the trick, just don’t get yourself one of these goofy things with a metal rack “iron rest”stuck onto the good end—that’s just a waste of money and space.
A Spray Bottle (optional)
Just a simple spray bottle, nothing fancy. I don’t use mine that much anymore, but every so often I’ll encounter a particularly stubborn wrinkle that needs a little extra moisture. I used a spray bottle quite a bit when I started out, though.
Getting Ready
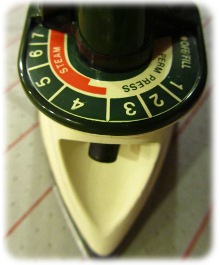
Plug your iron in and let it get hot. How hot? There are technically different temperatures for different fabrics. All my shirts are made from fabrics at the top end of the temperature scale, so I’ve never really cared that much as my shirts get smooth. My iron goes up to “7,” so I usually just dial it up to the max.
Damp Shirt (optional)
I have found that ironing a damp shirt works best, but it’s not essential. You can either give it a good spritz with your spray bottle, or you can iron it right out of the washer. As I mentioned above, I’ve gotten away from using a spray bottle.
These days, after washing my shirts, I put them on hangers and let them air dry for a while, then start in with the ironing. But I’ll still iron my shirts dry if I’m pressed for time.
The Process
The Collar
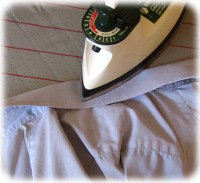
Run your now-hot iron along the back of the collar, getting it smooth, flat, and as wrinkle-free as possible. Then fold the collar down and give the iron a good solid press directly in the center of the collar, right where it would rest along your spine.
Right (Button) Side
Line up the right shoulder snug against one of the corners of the board’s good side, just like you were putting the shirt on, and lay the shirt along the length of the board. Run the iron over the shirt, making sure to get the space in between the buttons; you want the fabric there as smooth as possible so the front of the shirt lies flat when you’re wearing it.
Left (Button Hole) Side
Line up the other shoulder against corner opposite the one you used in the previous step and run the iron along the fabric. Paying close attention to the placket (I prefer a French Placket). This is the part of the shirt that is most visible to people, unless, of course, you’re wearing a tie. Then again, if you’re sporting a bow tie, a smooth, crisp placket is mighty essential.
The Sleeves
I start with the right sleeve. Not sure why, that’s just how it works. You could just as easily start with the left.
Unbutton all the buttons, lay your sleeve along the broad end of the ironing board where it meets the body of the shirt, make sure the fabric is smooth on the top and bottom of the sleeve, and give it a nice quick run with the iron. I like a razor-sharp edge on my sleeves, but you can engineer a more rounded edge by not ironing along the fold.
If you smoothed out the sleeve just right, which takes a little practice, you only need to iron one side (the front side). If you get wrinkle on the back side, don’t worry. Unless you’re going to a fashion show, no one is likely to notice. But if this is going to bug you, grab your spray bottle, squirt some water on the crease, and smooth it out.
If the cuff looks wrinkled, give it a quick pass with the iron if you want, but you can usually safely skip this step without making a social faux pas. I tend to roll up my sleeves or wear a jacket, so any ironing imperfections in the cuffs go unseen by all but the most careful observers.
Repeat with the other sleeve.
The Back
This is where I depart from the advice of Mr. Williams, who likes to start with the back. In my experience, ironing the back is a waste of time. You’re either going to be wearing a jacket, so no one will see the back of your shirt, or it will get wrinkled as soon as you sit down, which negates all your hard work. So save yourself time, do yourself a favor, and skip the back.
You’re Finished
This technique works perfectly for cotton or cotton-blend long-sleeve shirts, which is about all I iron.
Don’t ask me about ironing pants. I have no practical experience with ironing pants, nor do I want to. It takes too long.
