John Muir Trail Basic Needs: Water
The traditional list of immediate human basic needs is commonly given as food (including water), shelter, and clothing. And while that list is very simplistic, it does pretty much sum up what one needs to survive in the backcountry. So this is how I covered those basic needs during my 13-day hike of the John Muir Trail.
Basic Needs: Water
Drinking on the John Muir Trail
Safe water is something most of us living in the developed world take for granted. Outbreaks of pathogenic microorganisms are rare, and this is not something the average person even thinks of. But in the backcountry, water purity should always be top of mind.
During my 13 days on the John Muir Trail, I typically drank about a gallon (four liters) a day, but on the hotter and/or more strenuous days, I’d drink up to 1.5 gallons (six liters). Then I’d use another liter or so for cooking, depending on the meal.
I relied on three different methods to treat ever drop of water I consumed.
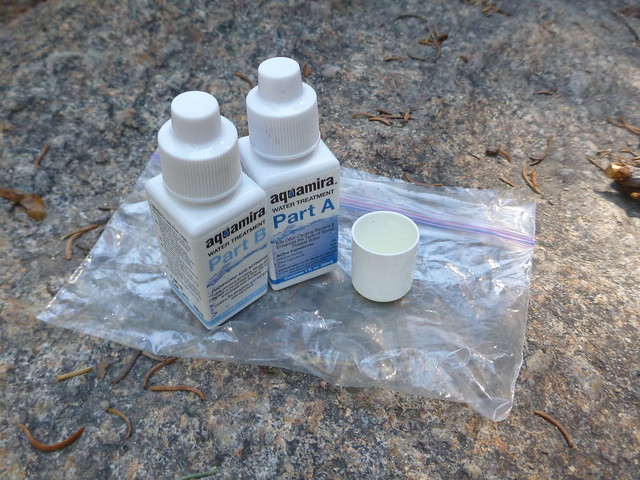
Chemical Method: AquaMira
AquaMira is a compact and lightweight two-part solution consisting of Part A (Chlorine Dioxide) and part B (Phosphoric Acid) that are mixed together to create a water-purifying solution.
It’s very simple to use:
- Combine seven drops of Part A and seven drops of Part B in the included cap.
- Agitate the solution and wait five minutes. The solution will turn yellow.
- Add to one liter of water and shake.
- Wait 15 minutes before drinking (30 minutes if cold or murky).
It works by releasing “nascent oxygen,” a highly active form of oxygen which is a powerful germicide and strong oxidant that kills all microorganisms, including the tough and feared Cryptosporidium cysts and, yes, even nasty viruses (a shortcoming of most filters).
At least that’s what the company says. But is that just marketing? Perhaps partly, but in chemistry, nascent forms of elements are typically single-atom varieties that are much more reactive than their garden variety cousins. Water treatment plants in many large cities have used this technique on a much larger scale with success since something like 1944.
The other popular chemical treatment is iodine, but it takes slightly longer, tastes terrible, and can build up in the body to toxic levels. In 2005, Backpacking Light compared a few of the popular chemical treatment options.
I didn’t use iodine, so I can’t tell say anything else about it, but I can tell you that my AquaMira-treated water tasted great.
Filter Method: MSR Hyperflow
I used a MSR Hyperflow Microfilter quite often for the first few days. Pumping water is a labor intensive process. It took me one minute and 45 seconds on average to pump a liter of water (not including the time to unpack and set up the pump), which is pretty quick as far as pumps go.
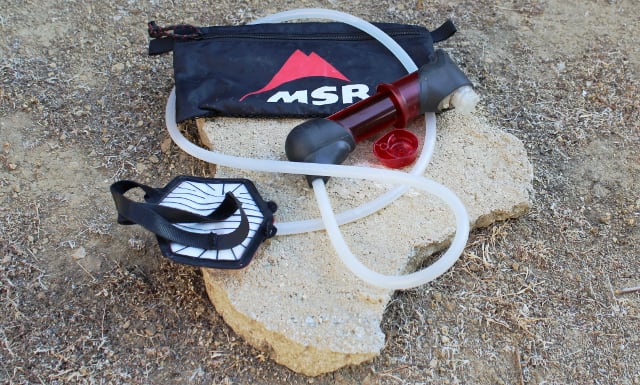
While that might be quite a bit less than the 15 minutes it took AquaMira to purify a liter of water, while using the pump I couldn’t do anything but pump water. With AquaMira, I could take five minutes to mix the solution (and have a snack), treat the water, and keep on walking. Also worth noting, most filters are no guarantee against viruses (but it’s commonly believed that viruses are very rare in North American water).
So it didn’t take me long to get over the idea of particulate matter floating in my water, and I decided to resort to using AquaMira for most of my water treatment needs. That said, I did use the pump a few times later in my journey when the water was particularly murky.
Another hiker I met used the Sawyer inline filter attached to a hydration reservoir. (Sawyer doesn’t make this anymore — it seems to have been replaced by the Sawyer Mini). He found that it was mighty convenient and time-saving to be able to quickly fill up with a full three liters of “dirty water” at a stream and immediately keep walking and drinking with almost no downtime.
One of the biggest arguments against pumps (besides that virus vulnerability issue) I hear is that pumps are mechanical and can break. Mine didn’t, but, again, I didn’t use often enough to stress it out.
But despite the downsides, the pump did give me a level of security, and unless I’m really weighted down, I’ll probably be bringing it on future hikes. Clean, drinkable water is one of those things it’s nice to have a back-up for.
With all this about purification and treatment, it’s worth mentioning that there is a school of thought that says you don’t need to treat your water in the Sierras. I met many hikers, mostly doing the PCT, who opted to drink right out of the stream. They typically carried one small (500ml or so) bottle and would fill it at a water source, drink until no longer thirsty, fill the bottle again, and keep walking down the trail. More than once I met hikers who didn’t have any water and were wondering where the next stream was so they could fill up.
I don’t recommend this. During my hike, I encountered one hiker who was suffering from viral symptoms. She didn’t treat her water.
Boiling Method
I didn’t always use AquaMira if I was going to boil the water to make coffee in the morning or dinner in the evening. That was about it. Boiling is one of the most effective ways to kill microorganisms, but it uses a lot of your fuel. So while it’s a good — and even usually necessary thing for cooking — it’s not the most cost- or time-effective method for purifying your drinking water.
Water Containers
The thing about water is you have to have something to put it in. When hiking, this is usually a bottle or a hydration reservoir.
I’ve never been much of a reservoir fan. For some reason I can’t explain, I tend to not drink as much when using a bladder. Besides, I prefer (and enjoy) taking short breaks to have a few sips of water. So I carried two bottles. One I was actively drinking from, the other was being treated. When the first was emptied, I’d stop and treat some water to refill it and swap bottles.
Bottle Number One: Nalgene HDPE (weight: 4.1 ounces/253 grams). This bottle, made from soft high-density polyethylene, has the same volume as its the more common hard plastic Nalgene bottle (made of a material called Tritan [weight: 6.5 ounces/188 grams]), but is 1/3 lighter. I liked having the graduated measurements along the side. I know it’s a bit of a luxury, and I never really used them, but I liked that they were there.
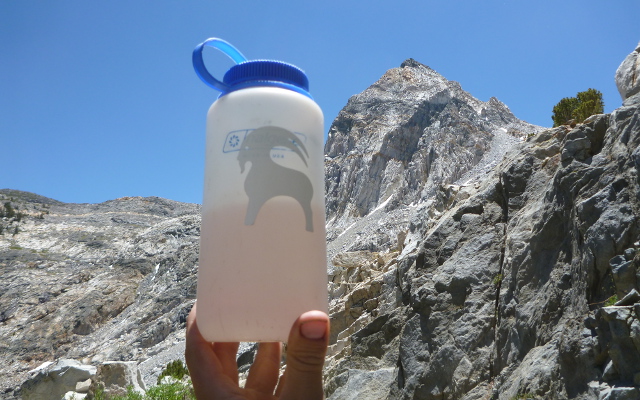
Bottle Number Two: Platypus One-Liter Platy-Bottle. As you may have read from the trail journal entry, I hated this thing. Sure, it held water. Sure, it was super-lightweight. But after a few days, it started to lose what little rigidity it had and frequently fell out of my backpack’s water bottle pocket. It was frustrating.
When I Do It Again
A lot of hikers carried re-purposed Gatorade or Smart Water bottles. These things are light, saving a significant amount of weight. After my Platy-Bottle fell on the ground for the hundredth time in mid-stride, I promised myself to adopt this plan for myself on future hikes.



Iodine isn’t commonly available anymore in the US because the tweakers were using it to cook meth. Back in the day I used it as a backup to my water filter, and actually had to use it one trip when my water filter broke. Bleh. It permanently stained my water bottle and it tasted *awful*. The newer chlorine dioxide treatments taste much better and work on crypto (with enough wait time) where iodine didn’t. Good riddance to iodine.