John Muir Trail Basic Needs: Shelter
The traditional list of immediate human basic needs is commonly given as food (including water), shelter, and clothing. And while that list is very simplistic, it does pretty much sum up what one needs to survive in the backcountry. So this is how I covered those basic needs during my 13-day hike of the John Muir Trail.
Basic Needs: Shelter
Big Agnes Fly Creek UL 1: A Good House for the John Muir Trail
Because I wanted to keep my pack weight at (or preferably under) 30 pounds, I needed to find a one-person shelter that was as lightweight as possible.
Many long-distance hikers extoll the virtues of carrying a simple tarp to keep their pack weight really low, so I looked into tarps and found promising options from Golite (now out of business) and MSR. Many tarps weigh in under one pound and can be set up with your trekking poles (and that earns even more weight savings by not having to pack and carry cumbersome tent poles).
The thing about tarps is they’re just a roof over your head, yet open to the the environment. While that did appeal to me (I’ve slept under the stars many times), the bugs along the JMT are supposed to be pretty bad in June (note: confirmed), so conventional wisdom called for bringing along insect netting (adding another nine ounces or so) if I went with a tarp.
The bigger hesitation for me, though, was that I’d never used a tarp before and setting one up properly looked to be a bit tricky. Sure, many people have used them over the years with great success, but still. I hesitated thinking about spending money on a sheet of fabric and procrastinated making a decision …
… then I read about the Big Agnes Fly Creek UL 1 ($320), which weighed in at only 1 pound, 14 ounces (comparable to many tarp tents plus insect netting). Unlike tarps, I’d pitched many a tent over the years, so I was sold and quickly picked one up from Backcountry.com.
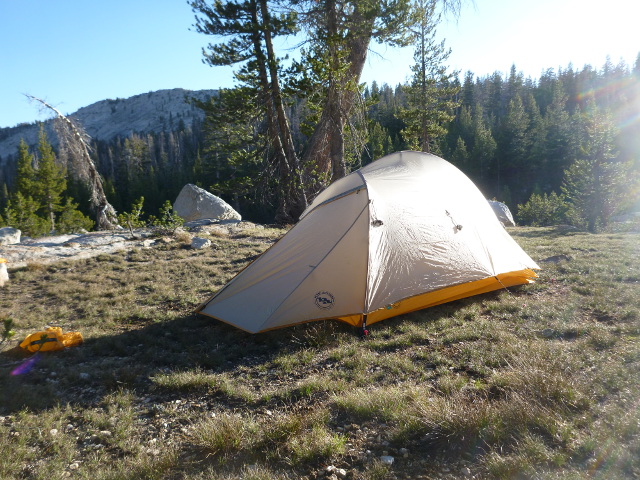
I’m going to give it to you straight: I love this tent. Not only was it light and packable (I strapped the poles to the outside of my pack), but it did double-duty as padding for my bear canister, providing extra comfort while hiking during the day.
I could set up the Fly Creek, from fully packed to fully staked out, in about two minutes. Inside, there wasn’t much wiggle room (I’m six feet tall, and I just fit), but I was still comfortable. I could sit up if I hunched over a little, but that wasn’t a big deal. Most of my time in the tent was spent lying down.
There are pockets along the side to store lighter items and a small “attic” where I stored my headlamp for quick access should nature call in the dead of night.
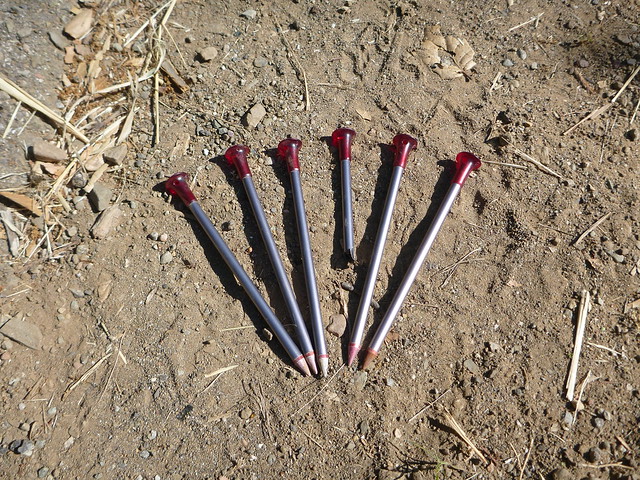
In the past, I’ve had bad luck with stock aluminum stakes meeting California soil, so I replaced the original flimsy stakes with MSR Carbon-Core stakes. Expensive ($30 for a set of four), but lightweight and strong — yet still no match for California soil in some places.
Regarding those places, I’d heard it could be a challenge to find a place to stake out the tent on the JMT, especially later in the trail. So I made a series of “rock-out loops” I could use to tie down the tent securely if I couldn’t use stakes. I only needed to use them partially once, and it worked okay. Since then I’ve discovered the guyline system that Andrew Skurka has developed. You need to know your knots, but it’s convenient and saves weight. (I’ve been experimenting with it with and plan on using it on my next adventure.)
My one quibble with the Fly Creek is that it’s not truly 100% free-standing. To be effective, and to give you a fair amount of interior space, two of the loops at the back of the tent have to be staked out. But that’s a minor thing, and the tent seemed to be a popular choice; I saw many hikers using it on the trail.
Conversely, I saw very few tarps, but one hiker I ran into frequently used the Notch from tarptent.com. It weighs about the same as the Big Agnes Fly Creek, but uses adjustable hiking poles (so it wouldn’t have worked with my fixed-length Black Diamond Z-Poles), but it looked like a great solution.
I might give the Notch a try one of these days, but until then, I’m more than content using the Big Agnes Fly Creek UL 1.

Really enjoying reading your blog. I’m spacing it out so I can compare it to my personal experience hiking the Muir. My wife and I hiked it in August 1995, after hiking the AT twice and after hiking the Tahoe Yosemite Trail in 1993. I would love to compare notes with you, about equipment, food, water treatment , and all the other details we both know are involved in such a wilderness adventure (example; we relied purely on bleach for water purification on the Muir). Some of your pictures evoke wonderful memories for me. Guitar Lake? Loved it. Unfortunately, after we left its shores we failed to find the campsites listed in our guide and wound up camping at 13,000 feet, just below the summit of Whitney. Just a sample of how I relate to your experiences. “Postholing” on the way up Forester Pass… Nearly unbearable mosquitoes near the snowmelt line… Your posting brings back many, many memories. Now I’m old and fat, but I remember….
Jonathan Morris
“the 6-foot hobbit”
hikerhobbit@hotmail.com
344 woodridge drive
busy, ky 41723
Thanks for the kind words, and I’m glad you’re enjoying revisiting the JMT. Sounds like you’ve done more than a little grand adventuring yourself, and I’d definitely love a little note comparison as well.
The Notch is a nice tent, that’s for sure. I have the Moment (the hoop-pole version of the Notch) myself because I’m a 1 trekking pole guy, using it for balance rather than support (getting old sucks, the alternative, alas, sucks worse). Unfortunately the original Moment is no longer sold by Tarptent (they replaced it with a heavier version with two doors and an “attic”), which is the fate of all too much of my gear — I arrive at something that works well for me, then they discontinue it!